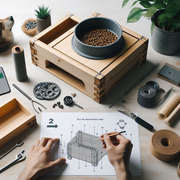
Not only can improving your dog’s feeding station help with their posture, but it will also accentuate your house décor. An industrial design raised dog feeding blends current, edgy style with utility. For those who enjoy do-it-yourself projects and wish to design a unique item fit for their own taste as well as those of their pet, this one is ideal.
We will walk you through the processes in this guide to design a reasonably attractive DIY industrial raised dog feeder that is also functionally useful.
Tools and Materials You’ll Need
Before you begin, compile the tools and supplies listed below:
- Wooden board: determined by the dimensions and quantity of the bowls
- Metal flanges and pipe legs.
- Metals for pipe fittings
- dog bowls
- Drill bits and drills
- Screws
- Measuring tape
- Saw (should one be cutting wood to fit).
- Sandpaper
- Paint or stain, optional
- Optional, wooden sealant
- pencil or marker
First Step: Getting ready the wooden board.
The raised dog feeder’s basis is the wooden board. It ought to be strong enough to hold the weight of your pet’s food and water as well as the bowls.
- Measure the size of your dog bowls and choose the number of bowls you wish to have included. On the wooden board, mark the outline of every bowl such that they are equally apart. Cut the hardwood board to your preferred dimension using a saw.
- Drill holes in the wooden board where you indicated the bowl outlines using a drill bit whose diameter fits the circumference of your bowl. The bowls should be able to sit firmly in place by having the holes somewhat smaller than the rim of the bowl.
- To smooth out any rough areas and stop splinters, sand the edges of the wooden board and the holes. Should you like, you can stain or paint the hardwood board to complement your house décor. For even more protection, apply a wood sealant.
Second Step: Assembling the industrial legs.
The elevated dog feeder’s industrial style comes from the metal pipe legs. They give the design something distinctive and are robust.
- Attach metal flanges, screws-driven from the four corners of the underside of the wooden board The metal pipe legs will start from these.
- Screw the metal pipe legs in the flanges. You can connect extra pipe fittings to change the leg length depending on the height you wish for your dog feeder.
- Make sure the feeder stands level and that every pipe is firmly sealed. As necessary to attain stability, change the legs.
Third Step: Finishing Touches
It’s time to finish your homemade industrial raised dog feeder after the foundation and legs are set together.
 Arrange the dog bowls through the holes you bored on the wooden board. They ought to be really tight and sit firmly.
- Make sure the feeder is not wobbling and is rather stable. Try it by weighting it somewhat and, if needed, modifying the legs.
- Customize the feeder with any last details or decorations. You may stencil your dog’s name on the wooden board or add some industrial-style accents.
Final Thoughts
Making a do-it-yourself industrial elevated dog feeder mixes design with use in an interesting and satisfying endeavor. These easy guidelines will help you create a distinctive feeding station that improves your house décor and offers your pet a comfortable meal environment. Whether you decide to keep the wood natural or add some color, the overall effect will be an amazing accent to your house. Happy Do It-ing.
 Arrange the dog bowls through the holes you bored on the wooden board. They ought to be really tight and sit firmly.