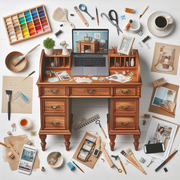
An enduring piece of furniture with classic elegance and utility is a campaign desk. Like any other piece of furniture, it can, however, eventually exhibit evidence of wear and strain. A do-it-yourself makeover is the ideal fix if your campaign workstation needs a new look. Your campaign desk can become a gorgeous centerpiece that accentuates your home décor with a few easy steps and artistic additions.
This post will help you through the process of giving your campaign workstation a makeover combining design with utility.
Getting Ready for Your Workspace
Prepare your workplace and compile all the tools you will need before starting your DIY campaign desk makeover.
Supplies You Will Need:
- Medium-grade, fine-gritty sandpaper
- Primer
- Paint (you decide on a color)
- Rolls and brushes for painting
- Painter’s tape
- Scissors
- Old newspapers or a drop cloth
- Either brass or gold hardware (optional).
- Top coat or sealer
Preparing:
- Your project should take place in a well-ventilated space to guarantee appropriate airflow during paint and primer application.
- To guard your floor against paint spills and drips, lay down a drop cloth or old newspaper.
- Using a screwdriver, take any current hardware from the desk and save it.
Prime and Sanding
Sanding the surface and applying a primer comes first on your campaign desk makeover.
Sanding:
- Sand the desk’s complete surface using medium-grit sandpaper. This smooths the basis for painting and helps to eliminate any old finish.
- Use fine-grit sandpaper for follow-up to guarantee a level and smooth surface. Using a wet cloth, wipe away any dust.
Priming:
- Using a paintbrush or roller, give the desk a coat of primer. Primer gives a consistent base and improves paint adhesion.
- Follow manufacturer’s directions on allowing the primer to dry totally.
Desk Painting
It’s time now to give your campaign workstation a fresh coat of paint. Choose a hue that accentuates your own style and home décor.
Painting:
 For intricate regions, use a paintbrush; for wider surfaces, use a roller first coat of paint. To minimize obvious brush marks, use uniform, fluid motions.
- Before applying a second coat, let the first one dry totally. This guarantees both a professional finish and even coverage.
- Once the paint dries, think about sealing or top coating for further durability. This guards the paint from wear and scrapes.
 For intricate regions, use a paintbrush; for wider surfaces, use a roller first coat of paint. To minimize obvious brush marks, use uniform, fluid motions.
Adding Final Notes
Adding finishing details that improve the desk’s general appearance marks the last stage in your do-it-yourself campaign desk makeover.
Modifying Hardware:
- Replace worn-out or antiquated original hardware with fresh brass or gold hardware. This accentuates the campaign style and lends a bit of elegance.
- Attach the fresh hardware tightly to the desk with a screwdriver.
Ornamental Highlights:
To personalize your workplace, think about including ornamental accessories as decals or stenciling. Select designs that improve the general appearance and complement your taste.
Final Thought
One satisfying project that lets you give an old piece of furniture fresh life is a DIY campaign desk makeover. These easy guidelines will help you turn your campaign desk into a fashionable and useful accent to your house décor. Whether you go with a basic neutral or a strong color, the overall effect will be a lovely and distinctive desk that captures your own style and inventiveness. Good décor.