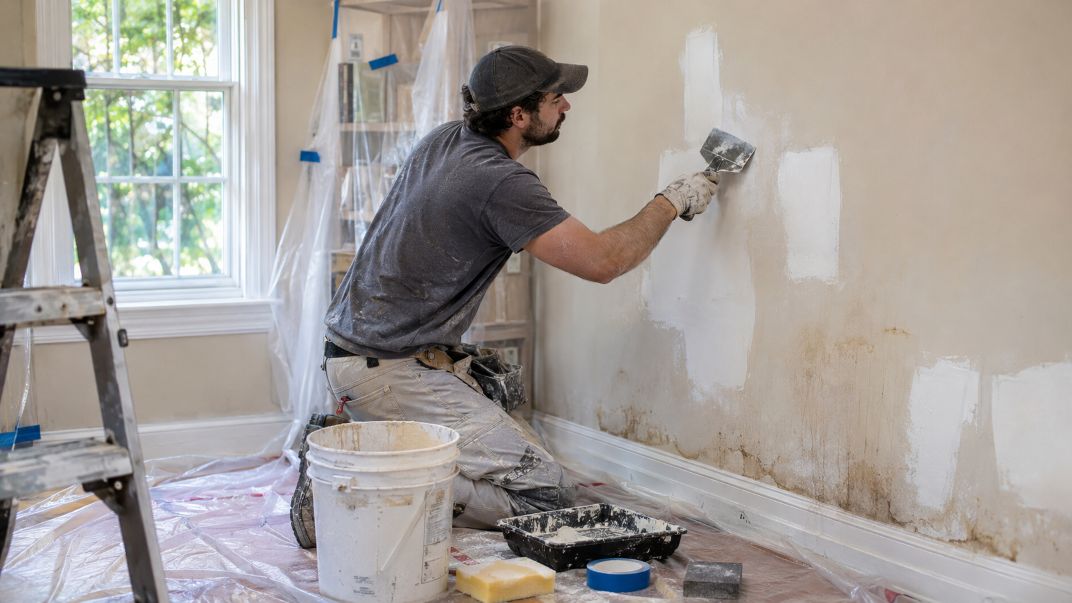
Water damage can quickly change the appearance of a home’s interior. Stained walls, damaged carpets, peeling paint, and warped furniture can make familiar rooms look neglected. Even after visible water disappears, damp materials may remain beneath floors or behind walls. Restoring these spaces requires careful repairs before choosing new colors, furnishings, and decorations.
The first priority is identifying and correcting the moisture source. Leaking pipes, damaged roofing, and flooding can leave moisture trapped inside building materials. Homeowners researching water damage restoration in Georgia can learn about the practical cleanup and drying steps that should come before cosmetic repairs. The U.S. Environmental Protection Agency (EPA) recommends drying wet materials within 24 to 48 hours whenever possible to limit mold growth.
Step 1: Assess the Damage Before Making Changes
Start by examining every affected surface. Look for discoloration, swollen baseboards, loose wallpaper, cracked paint, and uneven flooring. Check adjoining rooms because water can travel beyond the original leak.
The Massachusetts Department of Public Health explains that building materials may contain considerable moisture without appearing visibly wet. Moisture meters can help identify hidden dampness and confirm whether drying has been successful.
Photograph damaged areas before removing materials. These records can support insurance claims and help contractors understand the original condition. If structural or electrical damage is suspected, arrange a professional inspection before entering or beginning repairs.
Step 2: Decide Which Furniture and Decorations Can Be Saved
Replacing every affected furnishing may be unnecessary. However, keeping materials that cannot be properly cleaned or dried can create additional problems.
Items That May Be Restored
Solid wood furniture may be salvageable when exposure has been limited and the wood remains structurally sound. Metal and plastic furnishings are often easier to clean because their surfaces generally absorb less moisture.
Some washable curtains, removable cushion covers, and decorative accessories can also be retained after appropriate cleaning and drying.
When Replacement Makes More Sense
Upholstered furniture, mattresses, and carpets require closer attention. Their absorbent layers can retain moisture and contamination. The EPA advises discarding materials that cannot be thoroughly cleaned and dried, especially after prolonged flooding.
Consider professional furniture restoration for valuable pieces. For inexpensive furnishings with extensive swelling, odors, or mold, replacement may be more practical.
Step 3: Repair Walls and Ceilings Properly
Once drying is complete, address damaged drywall, plaster, trim, and ceiling materials. Avoid covering visible stains before confirming that the underlying surface is dry.
Inspect drywall for softness, swelling, and weakened seams. The EPA notes that drywall may sometimes remain in place when it has dried successfully, shows no significant swelling, and retains intact seams. Otherwise, affected sections may require replacement.
After replacing damaged materials, repair joints, apply suitable filler, and sand uneven surfaces. Finish with primer before painting.
Discolored ceilings may also need repairs if water has damaged the material above them. Treating only the visible stain can leave the underlying problem unresolved.
Step 4: Choose Flooring That Fits the Room
Flooring decisions should reflect exposure risks, maintenance needs, and the room’s overall design.
Carpet or Hard Flooring?
Carpet provides softness and warmth, especially in bedrooms. However, carpets and padding can be difficult to restore after significant flooding. Hard flooring may offer easier surface cleaning, depending on its material and installation.
Ceramic and porcelain tiles are useful options for bathrooms, kitchens, and entryways. Their finished surfaces resist routine water exposure, although grout, adhesive, and underlying materials still require attention.
Water-resistant vinyl flooring can offer a wood-like appearance. However, its water resistance does not guarantee that the subfloor will remain dry after flooding.
Before installing any replacement flooring, confirm that the subfloor meets the manufacturer’s moisture requirements. This helps reduce the risk of future lifting, distortion, and adhesive problems.
Step 5: Repaint With Suitable Materials and Colors
Fresh paint can make a repaired room feel noticeably different. Start with a clean, dry surface and use primer appropriate for the wall material and previous damage.
For kitchens, bathrooms, and other moisture-prone spaces, consider finishes designed for regular cleaning and humid conditions. Proper ventilation remains necessary because paint alone cannot prevent moisture problems.
Light neutrals, soft greens, and muted blues can create a calm atmosphere. Warmer shades may help living rooms feel inviting. Choose colors under both natural and artificial lighting before committing to the entire space.
Keep existing furniture and flooring in mind. A coordinated palette often creates a more balanced result than choosing paint colors separately from other decorative features.
Step 6: Refresh Decorative Details Without Overspending
After completing essential repairs, focus on affordable improvements that make the room comfortable again.
- Replace damaged curtains with washable fabrics.
- Use removable rugs where occasional moisture exposure is possible.
- Choose storage furniture that allows easy cleaning underneath.
- Refresh lighting fixtures and decorative accessories.
- Rearrange existing furniture to improve movement and airflow.
Small changes can produce a meaningful visual improvement. New cushion covers, coordinated picture frames, and carefully placed plants can refresh a room without requiring expensive furniture purchases. Homeowners can also explore small home decorating ideas for inspiration on making simple updates that complement existing furniture, colors, and finishes.
Avoid placing heavy furnishings directly against walls that have recently undergone repairs. Leave enough space to inspect surfaces and encourage air movement.
Step 7: Control Humidity and Protect the Finished Interior
A successful renovation depends on keeping moisture under control after repairs are complete.
The EPA recommends indoor relative humidity between 30% and 50% where practical. Excess moisture can encourage mold growth and damage interior materials.
Use exhaust fans when cooking or showering. Keep air-conditioning drainage systems maintained, and consider a dehumidifier when indoor humidity remains high. Open windows when outdoor conditions allow effective ventilation.
Regularly inspect plumbing connections, window seals, ceilings, and areas beneath sinks. Addressing small leaks early can prevent repeated damage to recently repaired surfaces.
Balancing Appearance, Durability, and Repair Costs
Interior restoration works best when homeowners separate essential repairs from optional decorative changes. Drying, cleaning, structural repairs, and safe material replacement should receive priority. Paint colors, furnishings, and accessories can follow once the room is ready.
Compare repair estimates, consider the remaining life of existing materials, and reserve part of the budget for unexpected problems. Affordable materials can still create attractive interiors when selected for their intended environment.
Ultimately, a refreshed home should offer more than an improved appearance. Careful moisture management, durable finishes, and practical decorating choices can help restored spaces remain comfortable, functional, and easier to maintain for years ahead.